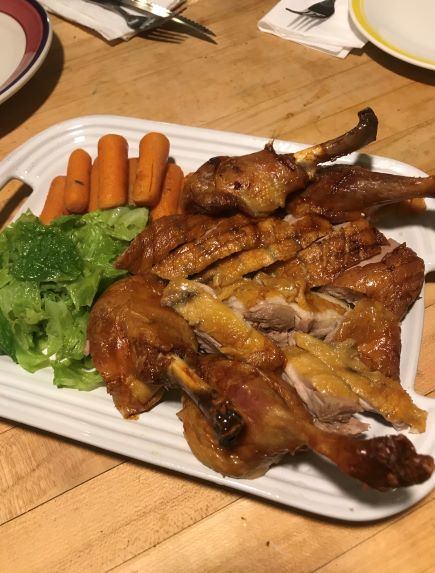
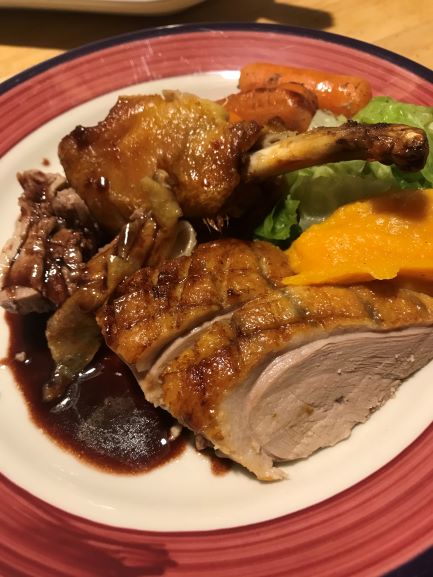
Around Thanksgiving a few friends of mine asked me how to roast a whole duck for the holiday. Now, I hadn’t roasted a duck in years, since culinary school actually, so I went back in my text books and did a ton of research to get them the best possible technique and thiese are the results. If you look on the web, there are tons of duck recipes out there that vary slightly in terms of cooking temperature, times and technique. I think this recipe is the best combination of all of them and offers a good balance of not-too-complicated techniques to yield what should be a golden brown, crispy, juicy duck.
I know duck isn’t something most people are cooking at home these days, holiday occasion or otherwise. But if you are willing to do just a little prep, a whole roast duck knocks the socks off your average chicken, for about the same price as a good quality bird.
A couple notes before getting started:
- You need to start the day before to get the best result: Not absolutely necessary but in order to properly dry out the skin in order to get the perfect golden brown perfection, day before is the way to go. And don’t skip the blanching step, it is key to rendering the fat. If you don’t want to deal with a big pot of water, just fire up the tea pot and pour boiling water over the skin to a similar effect.
- Open the windows: One thing that is hard to avoid given the amount of delicious fat that lies beneath a duck’s skin is a smokey kitchen. Even with the exhaust fan on full blast and all the windows open I still got a little smoked out. Next time I will bring over a floor fan as well and get the airflow blowing out the window before starting. If this still seems troublesome, you can roast the duck at much lower temperature, 250 or so, for much longer (maybe 3 hours) and then give it a last blast of high heat for 15 minutes at the end. This will produce a similar result with less smoke but didn’t win out for me in the end since it keeps the chef tied up in the kitchen for much longer.
- The most common ducks in the supermarket are labelled as Long Island ducklings. These are also known as pekin and have a mild flavored meat and a pretty decent amount of fat. There are many other vareties that offer richer, leaner meat (Rohan, Moularde) but for the convenience and price point, Long Island is perfectly fine.
- Duck breast is best medium but for a whole duck, a bit more cooked than that is fine. Roasting it on the bone keeps it moist.. To help ensure a breast that is just a little pink at the bone but a leg that is fully cooked (think well done but still juicy) we open up the meat and skin a bit on the inside of the leg. This creates more surface area and lets the heat pentrate the meat.
- One last note is about the cooking vessel. You need a roasting pan and a rack of some sort (I use a “half size hotel pan” here). I don’t like the standard roaster with the v-rack set up though because the duck sits too low. Unlike a bigger roast like a turkey or prime rib that will be in the oven considerably longer, a duck cooks relatively quick and needs even high heat all over to brown properly. For this reason, I go with a smaller pan and rack that will position the duck on top above the upper lip of the pan. We do still need a deep pan underneath though, as there will be a considerable amount of fat and drippings. Any rectangular pan that’s about 9″x12″ and 2-4″ deep is fine as long as the rack with the duck can sit on top, above the upper lip of the pan.
[wpurp-searchable-recipe]Whole Roasted Duck – – – [/wpurp-searchable-recipe]

Whole Roasted Duck
Ingredients
For the Roast Duck
For the Sauce
Instructions
Duck Prep and Roasting
-
Remove the bag of goodies from inside the duck. Reserve the neck and discard organs. Rinse and drain the cavity, remove wing tips and flats (the part of the wing with two bones and not the part that looks like a mini drumstick). If you want to be fancy, "french" the wing and drumsticks by removing the meat and cartilage at the end of the drumette. Carefully remove the wishbone (see Episode #29 for a how to video) and reserve.
-
Cut away the big chunks of fat at the opening of the cavity at the bottom of the duck and all but 1" of the skin at the neck if it is still attached and reserve.
-
Next, we need to do a few things to ensure that all of that delicious duck fat renders out perfectly so it is crispy and amazing and not kind of floppy and chewy. First, we poke holes in the skin. I like to use a sharp carving fork for this but you can also use a trussing needle, the tip to an injector, or a very pointy paring knife. Prickvthe skin all over, every 1/2" or so, even on the back.
-
Next, to further aid in crispifying our duck, carefully loosen the skin and fat from the meat of the breast and thigh. Take your time and work slowly to avoid ripping the skin. There might be a small membrane or connective tissue in the way, use a small knife to cut a small hole that will allow you to get a finger or two in there.
-
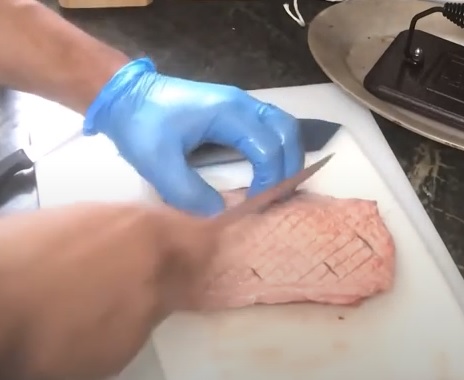
Last bit of cutting, use a very sharp, thin-bladed knife and cut a shallow crosshatch pattern through the skin but not all the way to the meat on the breast as well as the outside of the thigh. Be careful as you handle the breast meat as it tends to bruise a bit and will darken after cooking. Nothing bad to eat, just not quite as pretty. Finally, cut open the skin and meat around the inside of the thigh to help ensure proper and even cooking for both breast and thigh meat. This is not a huge gash, more like a surgical incision to open up a little air flow all the way to the deepest part of the thigh bone. Without breaking out your copy of Grey's Duck Anatomy, just cut a small slit, maybe 1" or so, perpendicular to the thigh bone, as close to where the hip and thigh meet he hip as possible,. There will be some fat and skin in the way, we want to leave as much on the breast side of the cut as possible. If you don't feel confident with this step you can skip it and just make the scoring you did on the outside of the thigh a little deeper so it goes all the way to the bone.
-
Ok, so there's a little more prep, but no more cutting! Fill a pot large enough to accomodate the duck 2/3 full with water and bring to a boil. Holding the duck by the legs, slowly submerge it as far as you can, at least to the bottom of the breasts and blanch for about 30 seconds. Carefully lift the duck out, allowing the water to drain, then flip it over and repeat with the other end, Holding by the wings now, lower the bottom half of the duck into the water. Blach the legs a bitlonger, maybe 1 - 1.5 minutes, then drain.. Transfer to duck to the rack on which it will be roasted and cool until you can handle it. Season the duck all over with salt, coating it lightly but evenly on all sides and in the cavity. Place all of the spices, ginger, garlic and lemon in the cavity. Place the duck in the refrigerator unwrapped, at least 4 hours, up to 1 day.
-
When ready to cook, heat the oven to 500 F and open a window. Note: If you have a convection oven (meaning it has a fan to blow the hot air around), heat to 425-450. Bring the duck to room temperature, at least 30 minutes outside of the fridge, before cooking.
-
See note on roasting pans and racks. Place carrots, shallot or onion and celery, neck, wish bone, excess fat, wing tips, optional dried mushrooms along with 2" of stock or water in the pan and place the rack with duck on top. Using a pair of inexpensive wooden chopsticks to wedge under the wing and across the back to allow for air circulation. Season the whole duck again lightly with salt and rub with a very small amount of canola oil all over.
-
Roast the duck breast side up for 20 minutes. There will be quite a bit of smoke but fear not! If it seems like the fire department is about to show up, lower the oven to 425/450.
-
Lower the oven to 350 and flip the duck onto its belly, breast side down. I used two wooden spoons, one inserted into each open end of the duck. I would be careful with tongs as they might tear the skin. Cook 30 minute, raising the heat to 400 at the 20 minute mark. Lowering the temperature helps with even cooking and lets the smoke clear a bit.
-
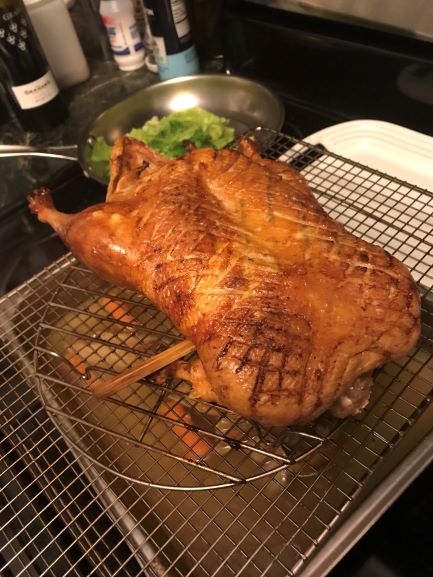
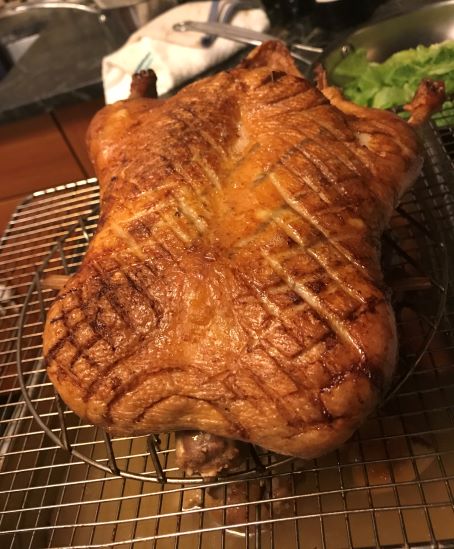
Increase the temperature to 450 and flip the duck back onto its back and cook another 20 minutes. We are looking for evenly browned and crisp skin and a temperature of 165 in the thickest part of the leg and 150 in the breast. If the skin is not browned to your liking, leave it in another 10-15 minutes. If the breast is done but the legs are still way undercooked for some reason, pull the duck now, remove the legs and pop them back in the oven for another 15 minutes to finish up. You can always give the breast a quick flash again once the legs are done.
-
Drain any juices in the cavity back into the roasting pan and transfer the duck to a cutting board. Cover loosely with foil and rest 20 minutes. Meanwhile, make the sauce.
Make the Sauce
-
Strain all of the liquid in the pan under the duck into a bowl or measuring cup. Cool until the fat the accumulates on top can be removed. The carrots are super tasty btw so don't toss them! Those are a snack for the chef or even a side dish!
-
In a small sauce pan, combine the port, pomegranate molasses, sugar and balsamic and reduce over medium heat until the consistancy of maple syrup.
-
Pour in the defatted cooking jus leaving behind the last couple of tablespoons that might have some gross looking sediment. Raise the heat and reduce tuntil the sauce coats the back of a spoon. Adjust the seasoning with salt and pepper, a spash more vinegar, pomegranate molasses or another pinch of sugar. We are looking for a flavor that is sweet and tart with an underlying richness from the stock.
Carving
-
After the duck has rested, remove the legs, if you havent done so already, by cutting through the hip joint. If you don't know where that is, just grab the leg by the drumstick and give it a little wiggle. The point where the leg bends at the top of the thigh is the hip. Just like us!
-
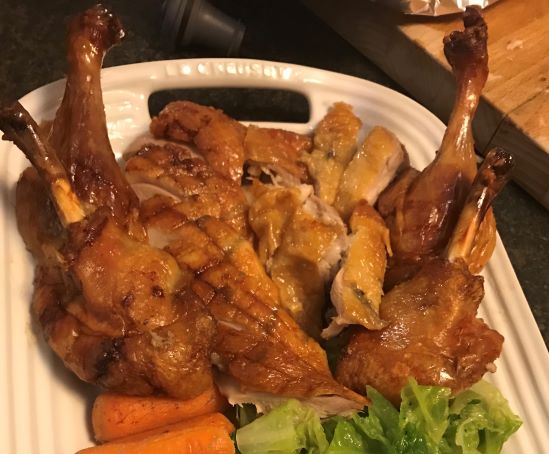
Cut through the knee to separate the drumstick using the same wiggle trick if needed. If you'd like to carve up the thigh, you should be able to cut/pull out the bone to make it sliceable. If that seems like too much cut down from the skin side parellel to the bone and dive the thigh meat in two. If you can get the bone out, slice the meat crosswise 1/2-3/4" thick.
-
Remove the wing drumettes using the same wiggle technique (think about the song, "The arm bone's connected to the...shoulder bone, the shoulder bone's connected to the...collar bone...")
-
To carve the breasts, you want to make a nice smooth cut right down the middle of the top part of the bird, between the two breasts. Now, this is the tricky part, carefully slice under one side of the breast (I like to start on the left because that side is easier for a righty) and release the meat from the bone, gently peeling it back away from the carcass as you go (gloves really help here with handling the hot meat). We want to scrape the tip of the knife against the bone so the breast comes off in one piece with all of the meat attached. (See episode #29 for a video. In that one I am carving a turkey but it's the same procedure.)
-
Slice the breast meat crosswise about 1" thick.
-
After you have gorged yourselves on the tastiest darn duck you've ever tried, pick any remaining meat from the carcass, including from the back and tail, and reserve. See the recipe on how to make duck soup for what to do with the bones.

